


visionOS is the new operating system that comes with the Apple Vision Pro devices, released three months ago. This article provides a detailed walkthrough on how to build a basic application for visionOS. To begin, you need a Mac with an Apple Silicon chip and Xcode installed.
Key Features of visionOS
visionOS introduces three types of views:
-
Windows: Traditional SwiftUI windows, which now support 3D content. These are similar to the windows you might already be familiar with in SwiftUI, but with added capabilities for 3D.
-
Volumes: SwiftUI scenes dedicated to 3D content. These are spaces where you can place immersive 3D elements and interact with them in a more dynamic way.
-
Spaces: Entire spaces dedicated to a single app. These spaces allow an app to fully immerse the user, hiding other applications and providing a focused experience.
Creating a New Project
To create a new project in Xcode:
- Open Xcode and go to File -> New -> Project.
- Select the visionOS tab and create an application.
- Choose a Window scene with a Mixed Immersive Space, as shown in the picture below:
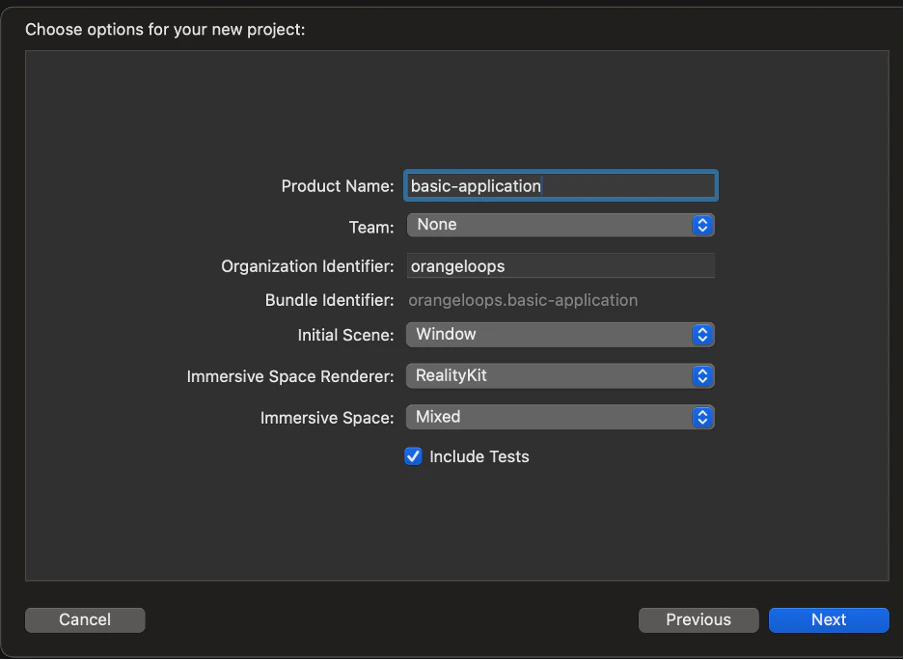
This setup will generate a simple application with both a Window and an Immersive Space. You can run the app in the Simulator included in Xcode. Here is what you’ll see:
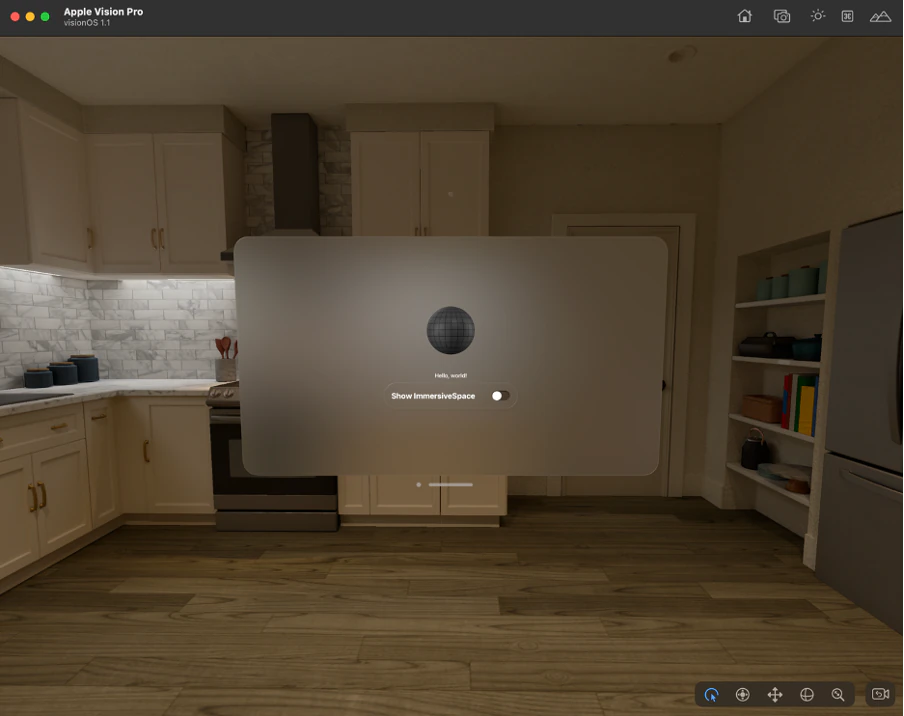
The basic_applicationApp file is structured as follows:
import SwiftUI

@main
struct basic_applicationApp: App {
  var body: some Scene {
	WindowGroup {
  	ContentView()
	}

    ImmersiveSpace(id: "ImmersiveSpace") {
  	ImmersiveView()
	}
  }
}
In this code, ContentView() provides the standard window view within a WindowGroup, while ImmersiveView() defines the immersive experience within an ImmersiveSpace. By default, the ImmersiveSpace is closed, but it can be toggled open via a button in the window. The Window can be edited as you would any SwiftUI window.
Adding Effects to the Sphere
To enhance the sphere with a rotating effect on tap, follow these steps:
- Add a @State variable for rotation degrees in ContentView:
@State var rotationDegrees = 0.0
- Apply a rotation effect to the 3D model:
Model3D(named: "Scene", bundle: realityKitContentBundle)

  .padding(.bottom, 50)

  .rotation3DEffect(.init(degrees: rotationDegrees), axis: (x: 0.0, y: 1.0, z: 0.0))
- Add a tap gesture to modify the rotation degrees:
Model3D(named: "Scene", bundle: realityKitContentBundle)
  .padding(.bottom, 50)
  .rotation3DEffect(.init(degrees: rotationDegrees), axis: (x: 0.0, y: 1.0, z: 0.0))
  .onTapGesture {
	withAnimation() {
  	rotationDegrees += 360.0
	}
  }
Using withAnimation, the rotation will be smooth, allowing users to see the movement clearly.
Interacting with the Immersive View
The immersive view offers rich interactions with 3D objects. Here’s how to add and interact with a 3D model:
Creating a Scene with Reality Composer Pro:
- Open Reality Composer Pro by navigating to your project folders, then go to Packages -> RealityKitContent -> Package and click on “Open in Reality Composer Pro”.
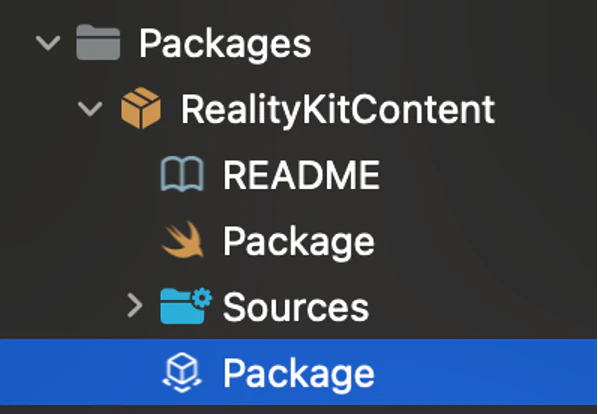
Opening Reality Composer Pro
- Inside Reality Composer Pro, add a new scene named “Moon” by clicking the highlighted button:
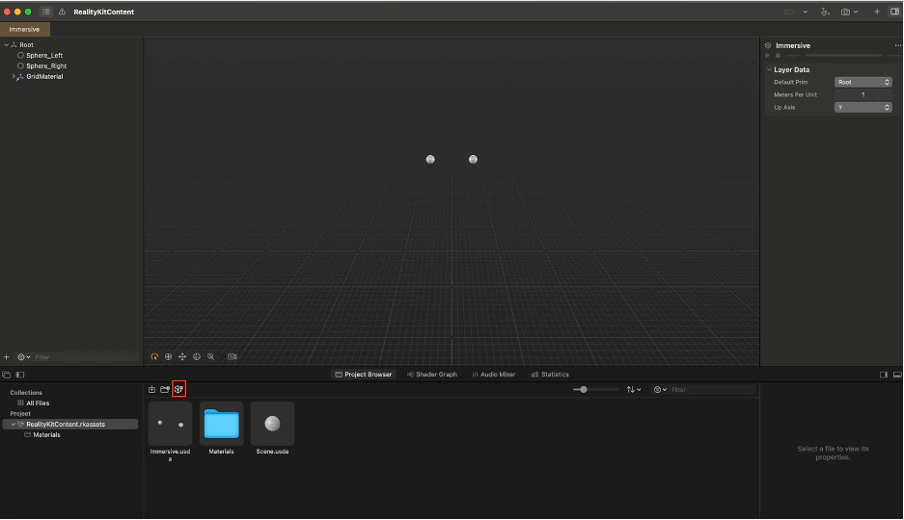
Adding a Scene
- Rename the scene to “Moon”. You can add a 3D model to this scene by clicking the + button at the top right corner, selecting the Moon model, and dragging it into your scene.
Loading the Moon Model in ImmersiveView:
struct ImmersiveView: View {
  var body: some View {
	RealityView { content in
  	// Add the initial RealityKit content
if let scene = try? await Entity(named: "Moon", in: realityKitContentBundle) {
  	content.add(scene)
  	scene.position = [0.0, 1.0, -1.0]
  	}
    }
  }
}
This code snippet loads the Moon model and positions it slightly above the ground in front of the user.
Adding Interaction Components:
moon.components.set(InputTargetComponent())
moon.generateCollisionShapes(recursive: true)
moon.components.set(HoverEffectComponent())
These components enable the Moon entity to respond to input and collisions, making it interactive.
Adding a Drag Gesture:
RealityView { content in
  // Code…
}
.gesture(DragGesture()
  .targetedToAnyEntity()
  .onChanged { value in
	value.entity.position = value.convert(value.location3D, from: .local, to: value.entity.parent!)
})
This gesture allows the user to drag the Moon model around within the immersive space.
Adding a Magnify Gesture
To allow users to scale the Moon model, follow these steps:
- Add states for scale:
@State var scale = 1.0
@State var originScale = 1.0
- Add a MagnifyGesture:
RealityView { content in
  // Code…
}
.gesture(
  //Drag Gesture…
  })
.gesture(MagnifyGesture()
  .targetedToAnyEntity()
  .onChanged { value in
	scale = value.magnification * originScale
  }
  .onEnded{ value in
   originScale = scale
  })
- Apply the scale in the update closure:
RealityView { content in
  // Code…
} update: { content in
  moon.setScale(SIMD3<Float>(x: Float(scale), y: Float(scale), z: Float(scale)), relativeTo: nil)
}
.gesture(
  //Drag Gesture…
})
.gesture(
  //Magnify Gesture…
})
The update closure ensures that the Moon model scales smoothly in response to user gestures.
Conclusion
These examples provide a glimpse into the vast possibilities that visionOS offers. By following these steps, you can create immersive and interactive experiences with Apple Vision Pro. Experiment with these features and let your creativity flourish!
References
Meet SwiftUI for spatial computing
Go beyond the window with SwiftUI