
WebAuthn is a browser-based API that allows servers to authenticate users by using public key cryptography. This global web standard written by the W3C and FIDO makes possible the integration of strong authentication methods, like biometric readers or security keys, in web apps. We were curious to see how it works and we’re sharing with you our findings.
Let’s get started first with the available types of authenticators.
Types of authenticators
Based on the web system we’ve tried, WebAuthn supports:
- Fingerprints scanners in MacOS (Touch ID) and Android.
- Facial recognition systems, like Windows Hello.
- NFC in computers with that technology built-in.
- Security keys.
One thing to notice about fingerprints scanners is that even though MacOS supports this kind of authentication method, there is no native support for iOS devices. The same happens with FaceID for facial recognition.
Now, let’s take a look at the browsers that support Web Authentication.
Supported Browsers
For our project in particular we tried to implement WebAuthn in Chrome and Firefox. Both browsers support every authenticator listed before.
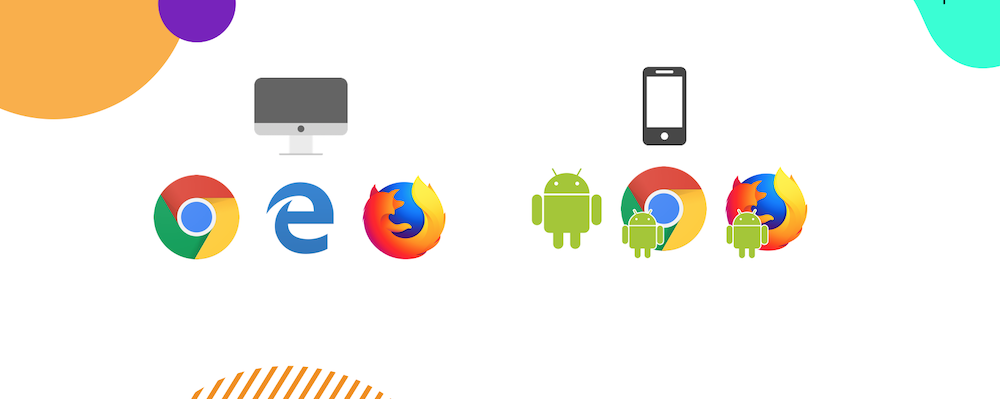
Supported computer browsers are Chrome, Edge, and Firefox. In mobile, we have Android WebView, Chrome, and Firefox as well.
Note that you must be using HTTPS protocol in order to have WebAuthn API features available.
How does WebAuthn work?
As with any other kind of authentication system, the first step is to register a user that will be able to log in afterward. In our testing we used two different Security Keys: one from HyperFIDO and another from Yubico. This process could be represented as the diagram shown below:
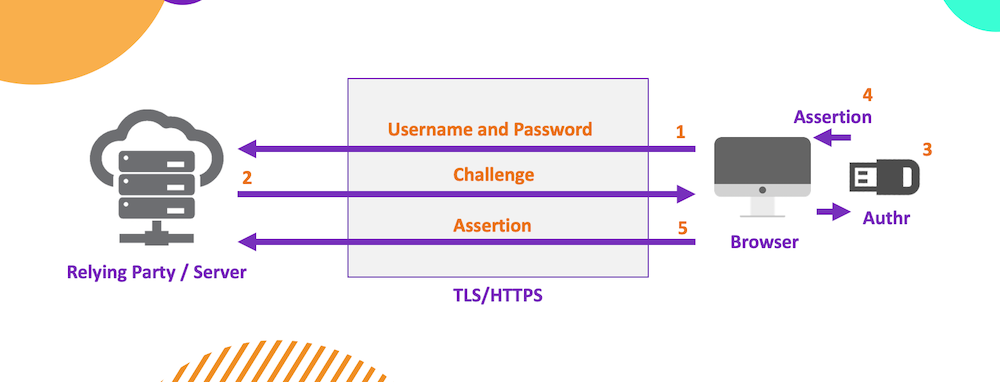
The user first sends a username and password of his choice (1) (even though setting a password is not a must, it is recommended for you to have a backup authentication method). Then the server sends back an answer or challenge (2) that will be used with the authenticator (3). This last one generates an assertion (4) which is later received by the server (5). Those credentials created before will be assigned to the generated assertion in order to recognize the user when needed.
When it comes to log in, the workflow is pretty similar. The user first enters his username and the RP (Relying Party) automatically responds with a challenge that requires the user to authenticate himself. For this, it has to be used the authenticator assigned before. This lets the server identify the user. If the authentication completes successfully, then he’s good to login.
If you have a supported authenticator you can test this process here.
Getting started
There are several Git Repositories officially shared by FIDO that you can find on WebAuthn site. In our case, we used the JavaScript library. Notice that you must have Node.js previously installed and a supported authenticator on your side. As we said before, it is also important to be working within an HTTPS environment.
Once you make sure that everything is set you can start playing with the demo project, adding your own configurations and properties. You will find that is quite simple to adapt it to your needs.
For instance, we went from a JavaScript project to a TypeScript one with React on client-side and Node.js/GraphQL on the server-side. This gave us a perspective about how it would look like to adjust a WebAuthn implementation.
Take a look at this code segment from the client-side of our TypeScript project that allows you to register a user with web authentication. In order for you to understand this workflow, we used the same steps of the diagram shared above:
Basically, the user enters his username and password that will be sent to the server after pressing the Register button (1). This is how it looks in WebAuthn.io demo:
Then the server receives the data, makes some verifications, and saves the information to the database. After that, the server generates a challenge and sends it to the client (2).
The client decrypts the challenge and user ID creating an object that generates a petition for the user to use a supported authenticator (3).
Then the user generates that communication by connecting, for instance, a Security Key (4).
That creates an object to respond with the result of the interaction between the user and the authenticator (5).
Finally, the server starts verifying all the data sent. If everything is fine, it will save the information to the database associating it to the user.
Final thoughts
WebAuthn works well and it is not hard to implement. There’s plenty of documentation about it, like this complete guide from Duo. However, it gives the feeling of still being in an infant state without support on a lot of platforms. This is why we think that passwords are not replaced but complemented as the authenticator could fail or eventually get lost if we’re talking about a physical key. At least not in the near future.
Yes, biometrics readers or security keys are more secure and you are not required to remember them. But what happens if you cannot use your finger or you don’t have that key at hand? Here is where old-fashioned passwords come in.
Do you want to add another layer of security in your web apps? We’re here to help!